This was a first-time for us with the gutters.
I have fixed them, cut them and broken gutters before, but I had never made one from scratch.
We got all the bits we needed to make the gutter for the Nursery roof, and it all slotted together well. Sorry I forgot to take pics of the process.
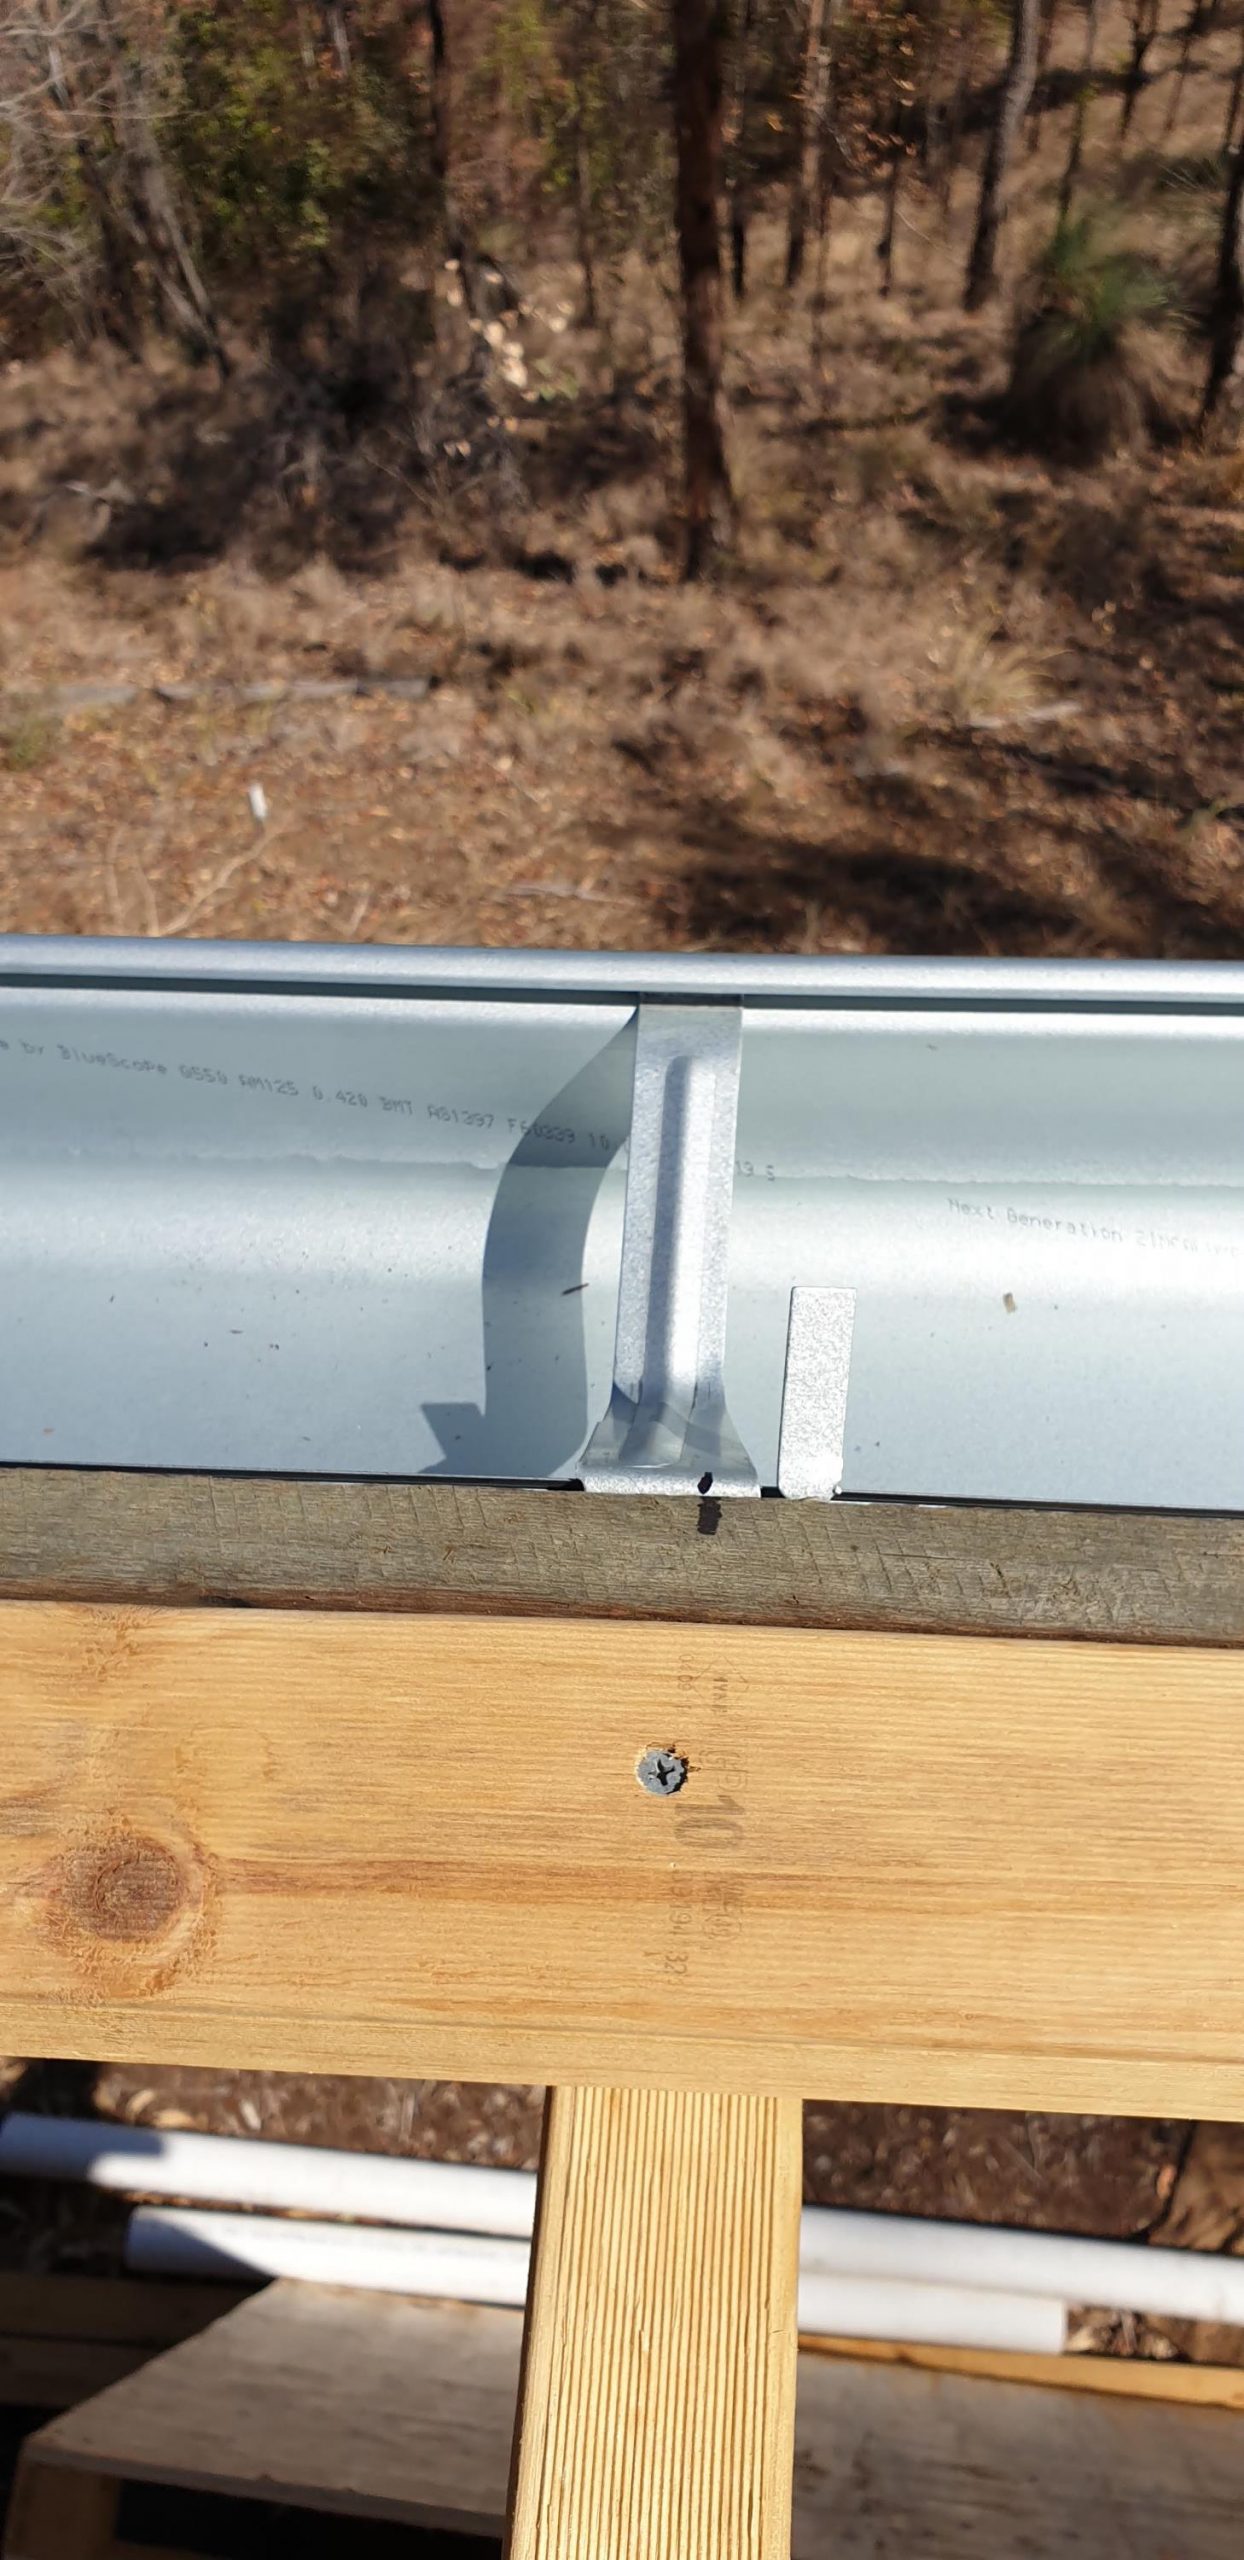
We needed 2 x 1.8m pieces of guttering, 2 x end pieces to close the end of the gutter, brackets to hang the gutter and a downpipe adaptor.
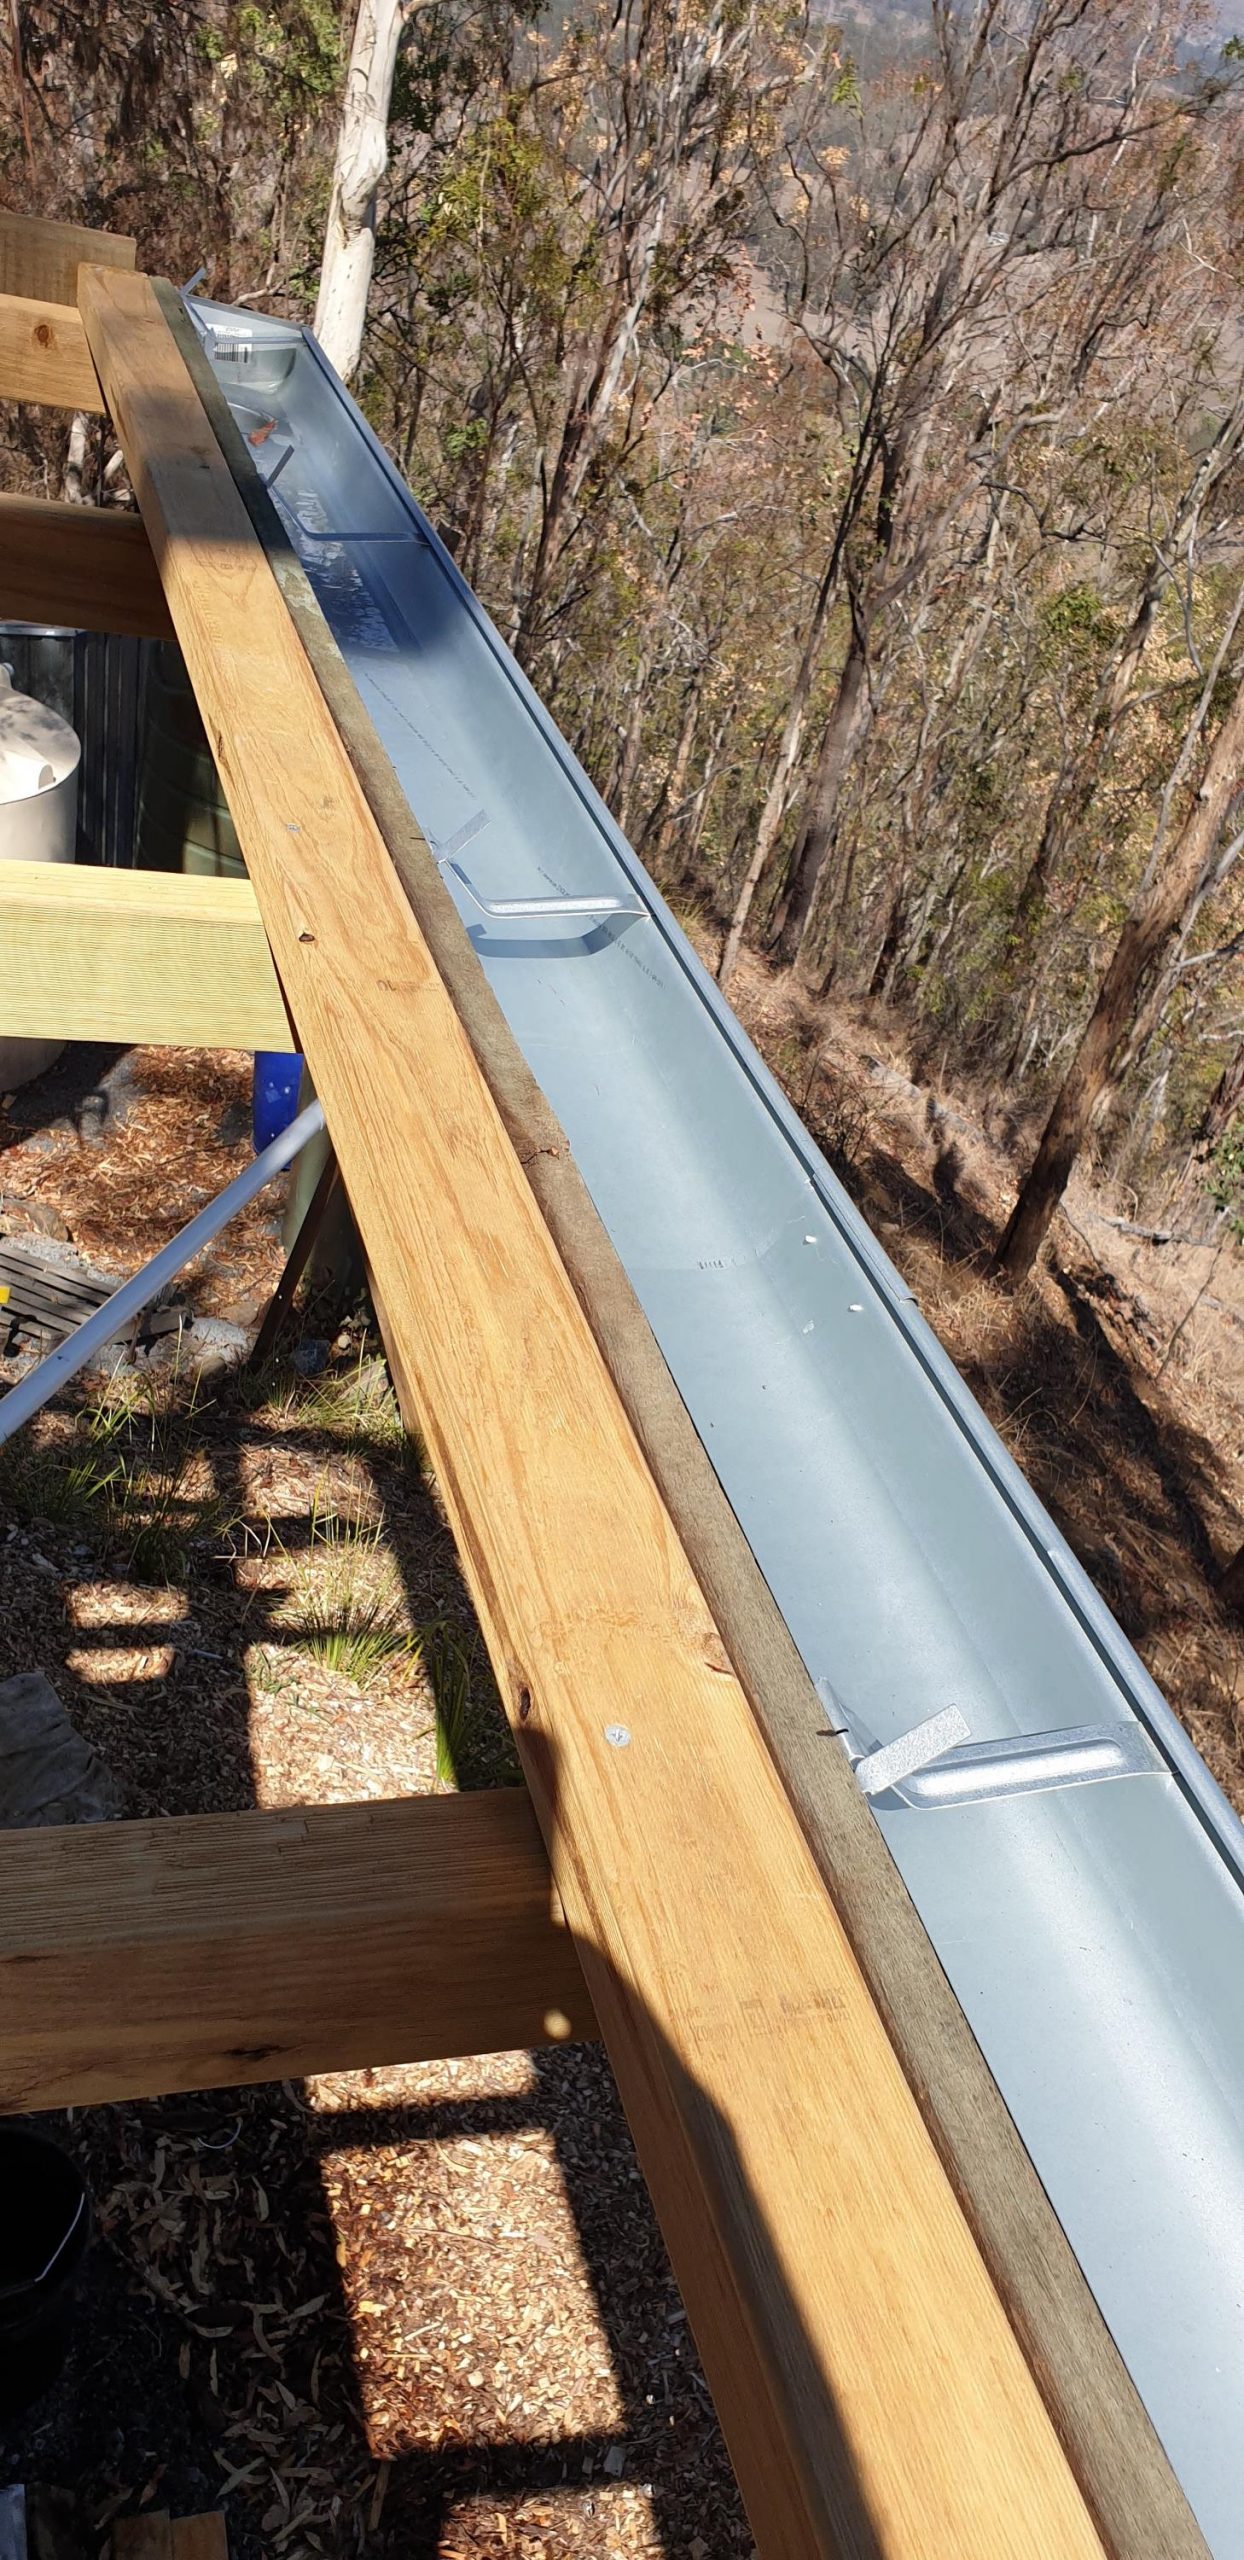
You can see all the elements on the completed gutter in these images.
We used a waterproof sealant on every join, and riveted joins where possible.
The truly tricky bit, and the bit you have to get right is – the position of your brackets on the fascia. This dictates whether the gutter has fall, and the direction of the fall.
The brackets are attached to the fascia first and then the gutter is slotted into the brackets. Because we had no ground space behind the Nursery Office, we could not attach the brackets with the fascia in place. We had to fix the brackets on the fascia before we installed it.
We ended up with a working gutter, but the bracket placement was not perfect and the fall was almost non existent…. but it works.
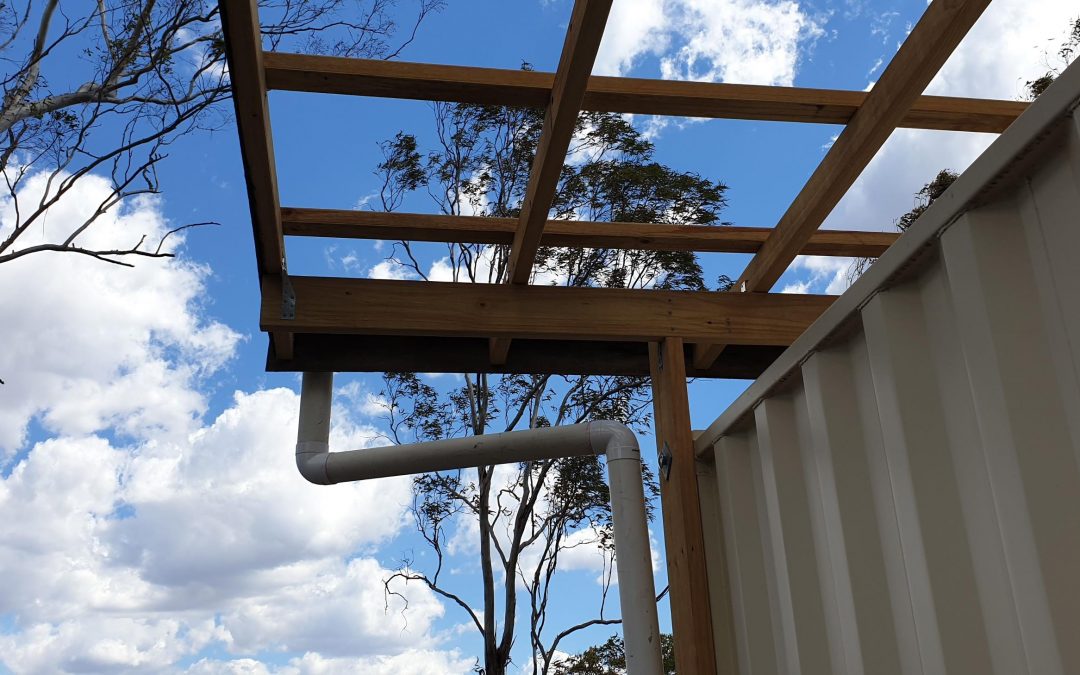
The downpipe is the last piece of the puzzle… and it is 90% done already


The next job will be the roof sheeting itself, and this will give us the ability to catch our own water for the first time at the Nursery.
We have the sheets and the fastenings needed so we should have the roof done fairly quickly.
With Summer fast approaching the added bonus is the shade that the roof will give the Office and the Nursery. We are looking forward to that shade.

Dave
Latest posts by Dave (see all)
- Webbing Caterpillars on Native Trees - April 28, 2022
- Easter Weeds – Easter Cassia - April 17, 2022
- Life goes on – 10 April 2021 - April 10, 2021
Recent Comments